Take Command Of The Wind


 Take Command Of The Wind

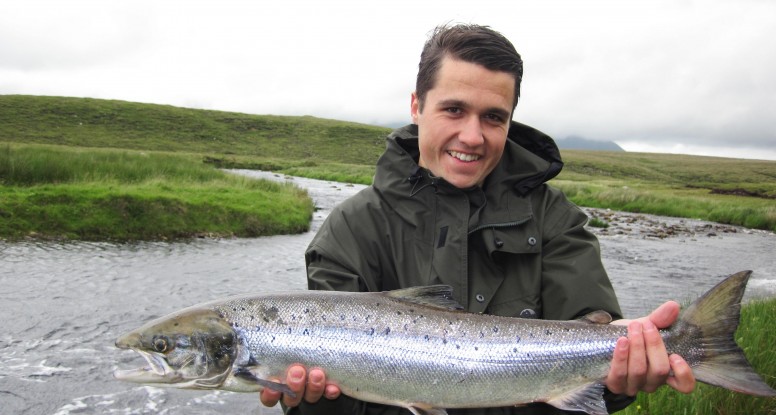
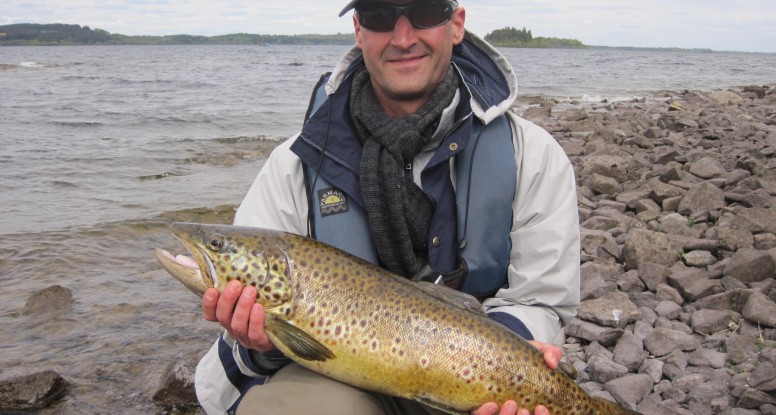
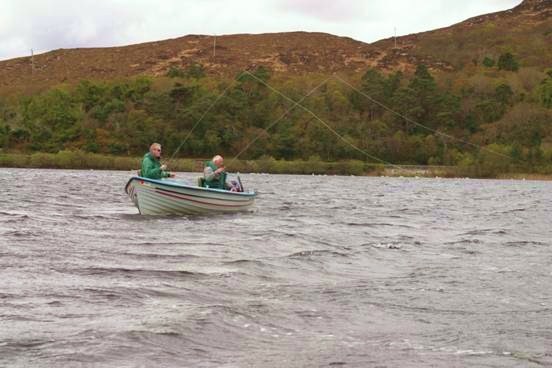
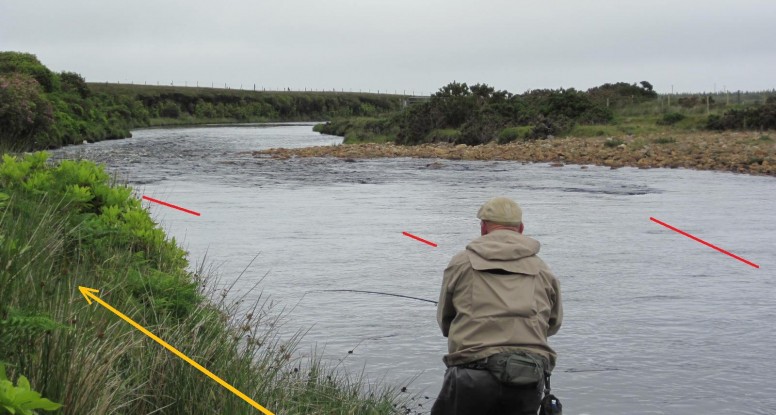
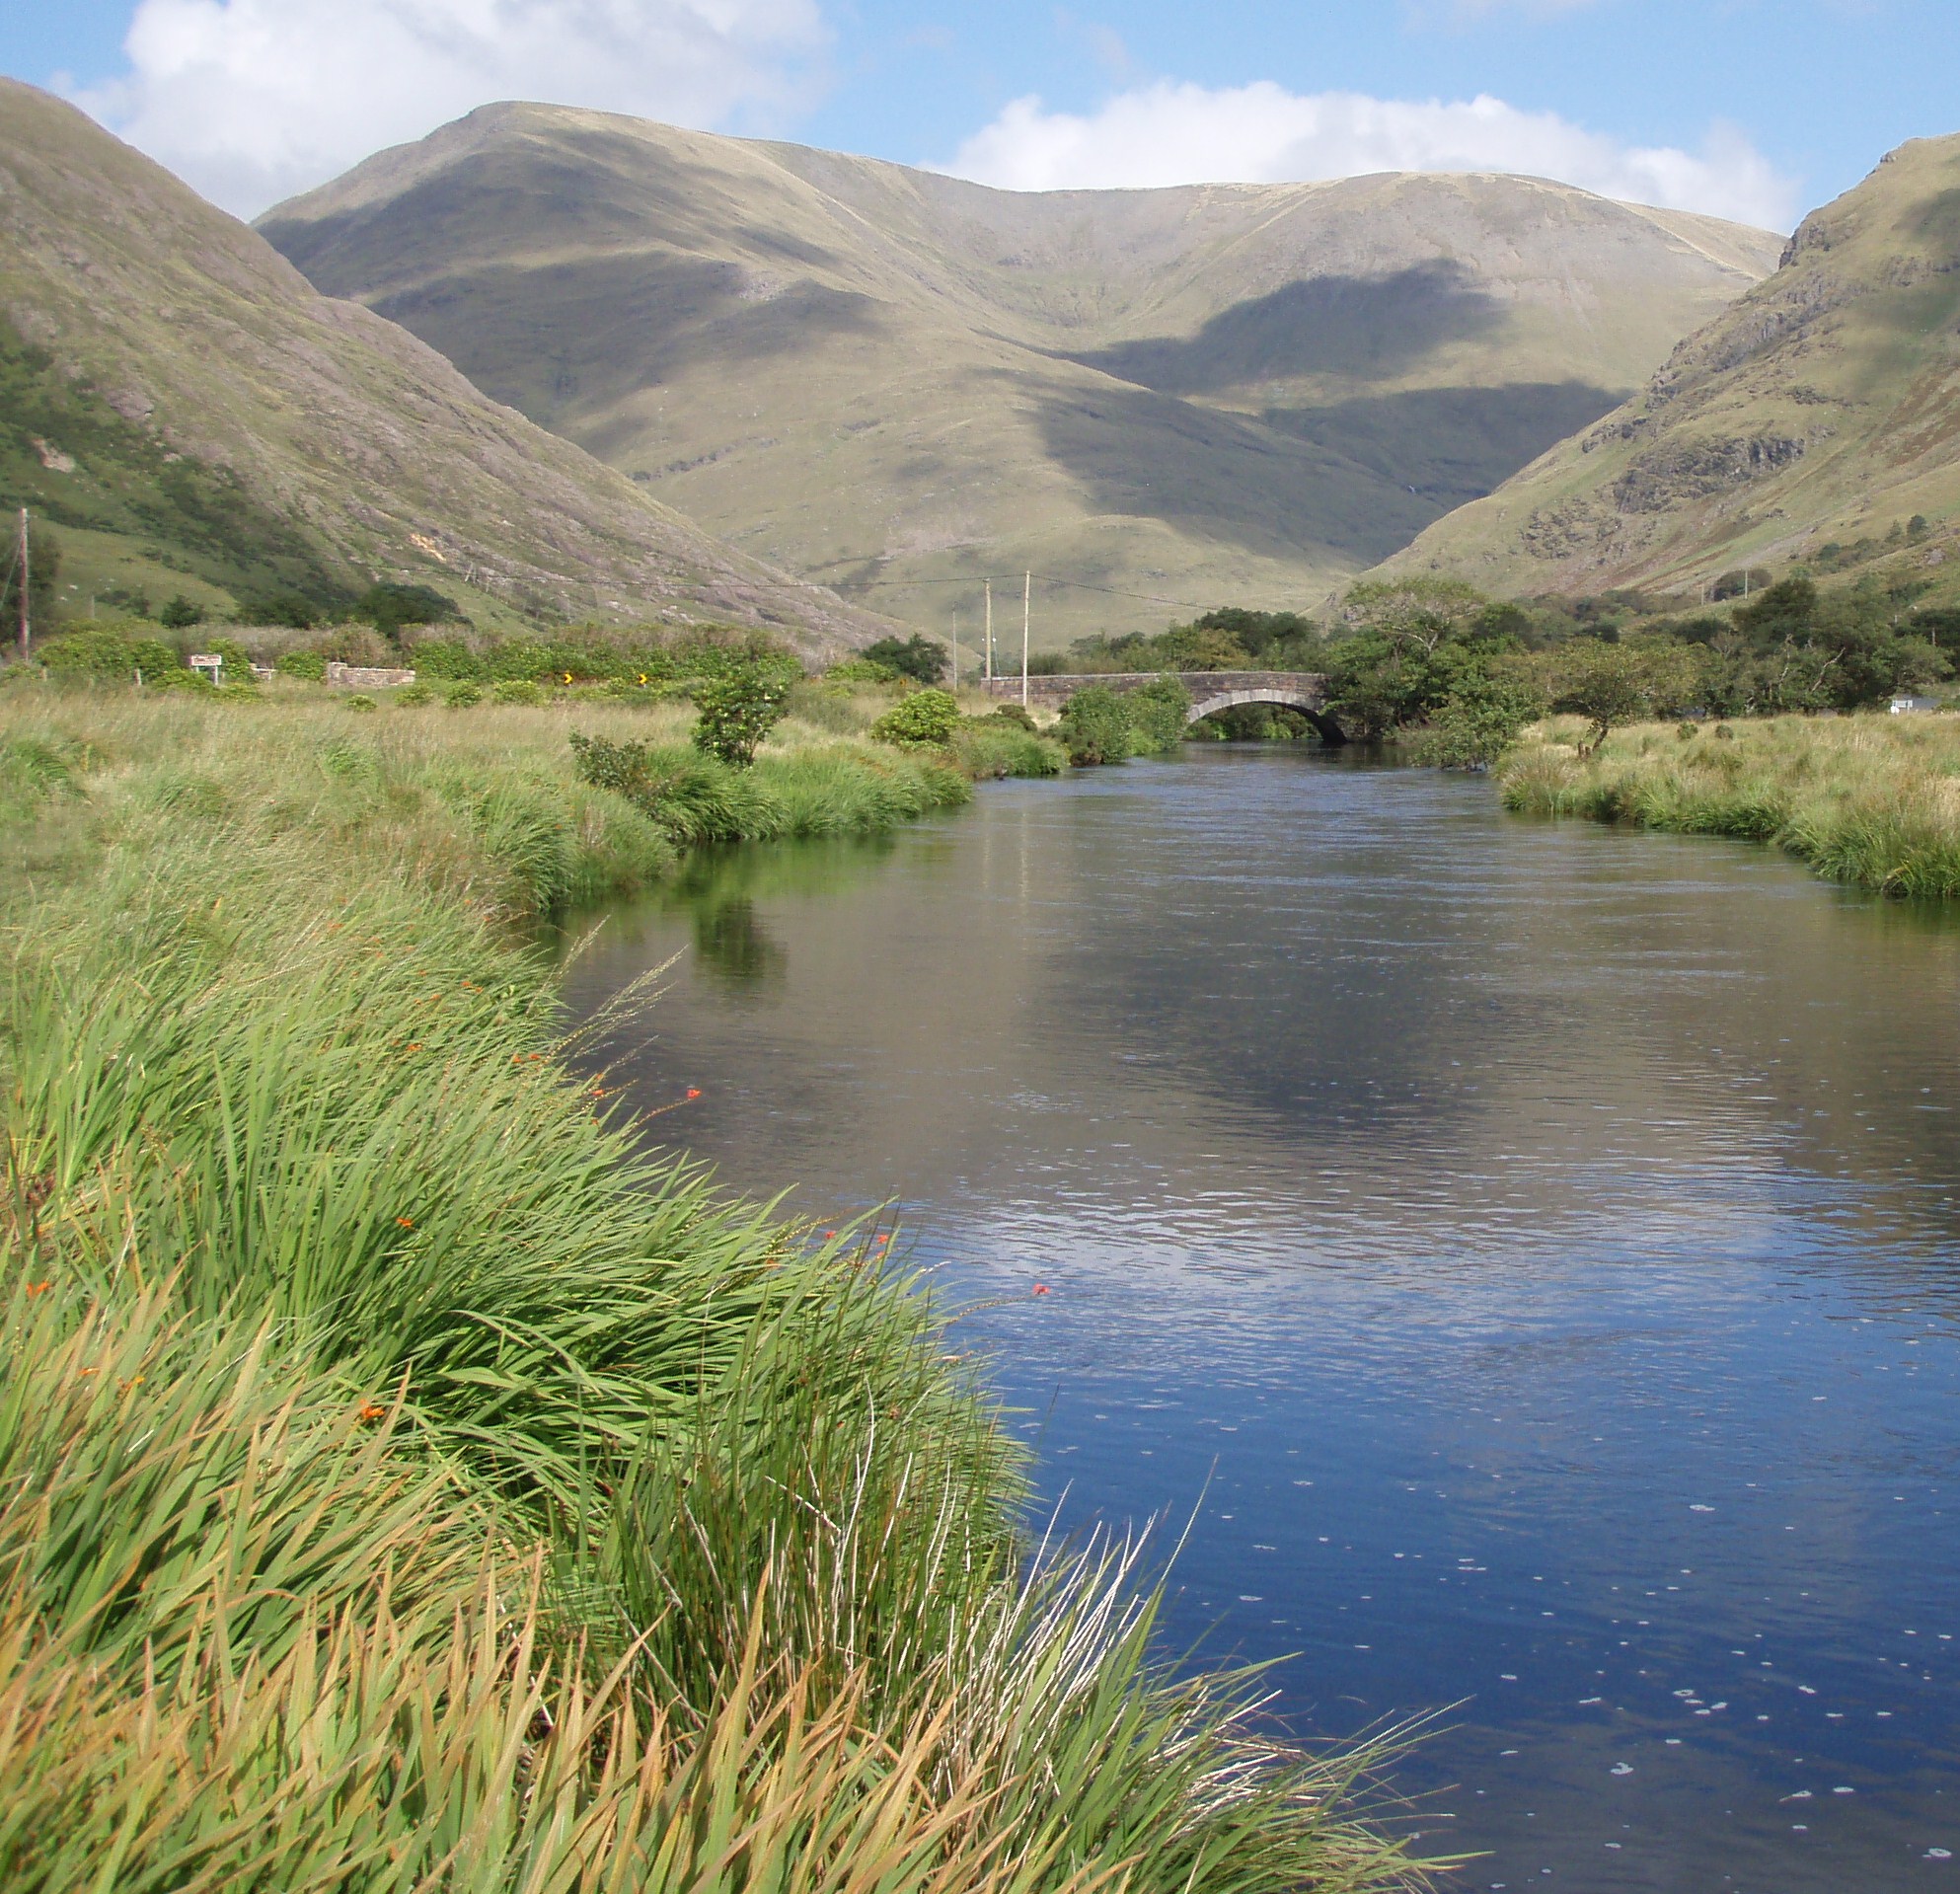
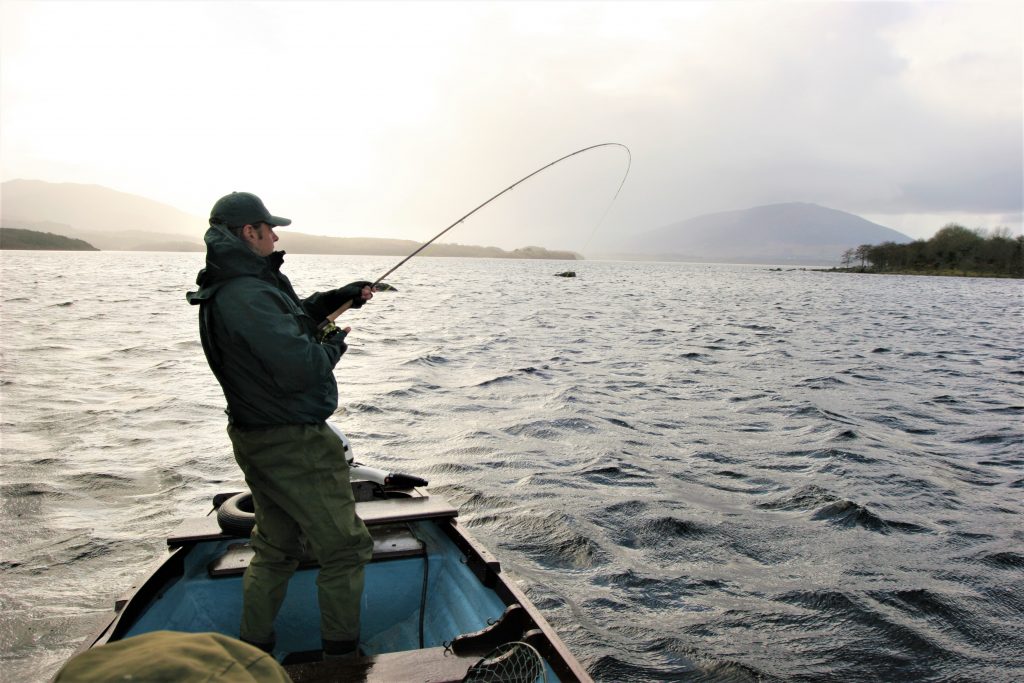
Just imagine the scene, there is a lovely soft breeze nudging your boat along the reservoir dam and you are occasionally connecting with some quality rainbows as you tease your team of flies back and up into that tantalizing hang position before recasting. What could possibly interfere to spoil your day?  Maybe you are drifting some wild rocky Irish or Scottish shoreline searching for an Atlantic bar of silver, or a wild brownie that will call for a celebratory dram or three in the local, come nightfall. The big spoiler for many fly fishers is strengthening wind conditions that may take them outside their normal casting comfort zone.

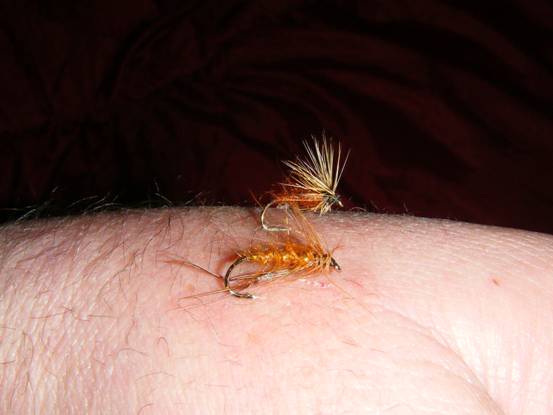
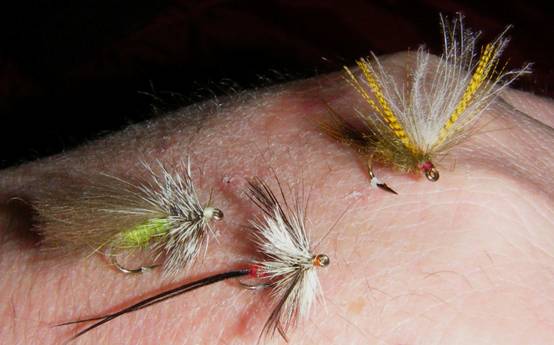
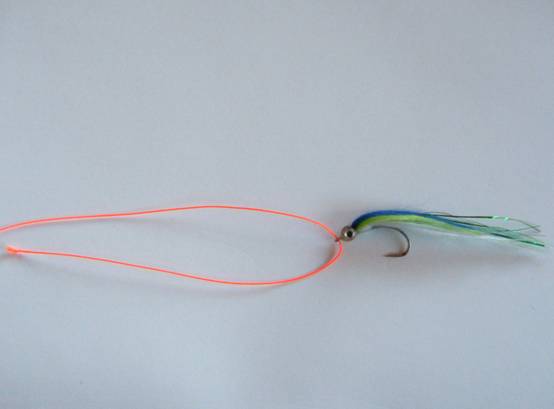
Any increase in wind speed makes it incrementally more difficult for us to fully straighten our fly lines behind our drifting boat and when we also factor in the long leaders that are often employed nowadays, then we can be in for some very interesting tangles! .   All these frustrating tangles can spoil our day but worse still is sticking one or more flies into ones person.  Fishing buddies often have a little chuckle when sharing anecdotes about the fly impailing boat partner from hell, secretly known as Vlad! ,  whose fishing technique takes a bit of a nose dive in efficiency anytime the wind gets up.   It’s always good to have a laugh but we need to be fully aware that there is always the danger of errant flies penetrating exposed flesh or gods forbid an unprotected eye.

The stronger the wind becomes the harder we have to work.  Even the resistance of the fly rod blank itself against a stronger wind will lead to extra physical strain not to mention the extra mental concentration needed to maintain the good technique that is required to straighten our line fully behind.  As the wind increases in strength our margin for error reduces dramatically, and this will affect us all, to a lesser or greater degree depending on our experience. Thoughtfully  readjusting our tackle and our fly casting technique will allow us all cope very well indeed with stronger winds and in fact if we get the right balance between tackle and technique we will actually use much less energy casting as the wind increases in strength.

Before we delve into the strategies we can employ on windy days it might be helpful to have a very brief look back at how previous generations of anglers actually fished and how tackle and techniques have evolved to where they are today. When I started traditional wet fly fishing on the Irish Loughs over forty five years ago there were many anglers still fishing the original short line style.  The short line style simply meant that the angler just cast a relatively short length of level fly line and the retrieve was executed by raising the fly rod back up into the vertical position and recast.  Skilled exponents would add wrist flickering and stuttering movements of the rod tip to make their flies come alive, but there was very little or no shooting or retrieving line.  It was very noticeable that some of these fly fishers changed over to roll casting when it got windy.

All through the 70’s and 80’s  fly rods and fly lines were continually being improved and this accelerated the already growing movement towards casting ever longer distances, longer retrieves, different sinking lines, longer leaders, and a whole new array of techniques that became possible because of these advances in tackle.  Compared to forty or fifty years ago we now have a bewildering array of techniques and different fly lines that are normally employed to be used at much further distances from the drifting boat .  Long casting seems to be the norm and when you add in occasional testosterone fuelled competitiveness it can lead to fishing our flies at needlessly excessive distance’s where the actual hooking up on the takes we get, can then prove very difficult indeed.

Why do you almost never see anglers using a basic roll cast anymore as their main delivery system when boat fishing?

There are a few reasons for this. Firstly many of the longer heads on our modern weight forward fly lines when combined with long leaders will have an overall length that makes roll casting difficult because of all the extra water surface tension involved. Because longer fly line heads and leaders make roll casting more difficult, anglers do not believe that roll casting could possibly be an equally efficient and effective alternative to what they see everyone else doing which is always overhead casting.  Most experienced fly casting instructors will tell you that the majority of their fly casting students will fail to have any real interest in practicing their basic roll casting technique but are very enthusiastic to practice normal overhead casting where achieving distance is easier and where they believe that they are making real progress.


Is roll casting as equally effective and efficient as standard overhead casting?

When we use our normal fly lines and leader set ups in calm or light breeze conditions , overhead casting is the most efficient and effective approach to take for many anglers.  I believe good roll casting technique when allied to a well-balanced outfit that is designed to make roll casting easy is equally effective and efficient, and when the wind blows up stronger out on the reservoir or lake, roll casting is then by far the best option.  Roll casting on a windy day allows you (if required?) to cast a long distance with absolute minimum effort and with the very important added bonus of never being in any danger from flies swishing past your ears.   As the wind increases in strength it should become easier and easier to present our flies, not more difficult.

Being able to comfortably cope and actually fully enjoy our fishing whenever the wind blows up a little really boils down to getting two main factors successfully sorted out. Number one is using a fly line that really suits roll casting and the second is sharpening up our roll casting technique so that it incorporates a smooth acceleration to a very crisp stop that is aimed in the correct direction.

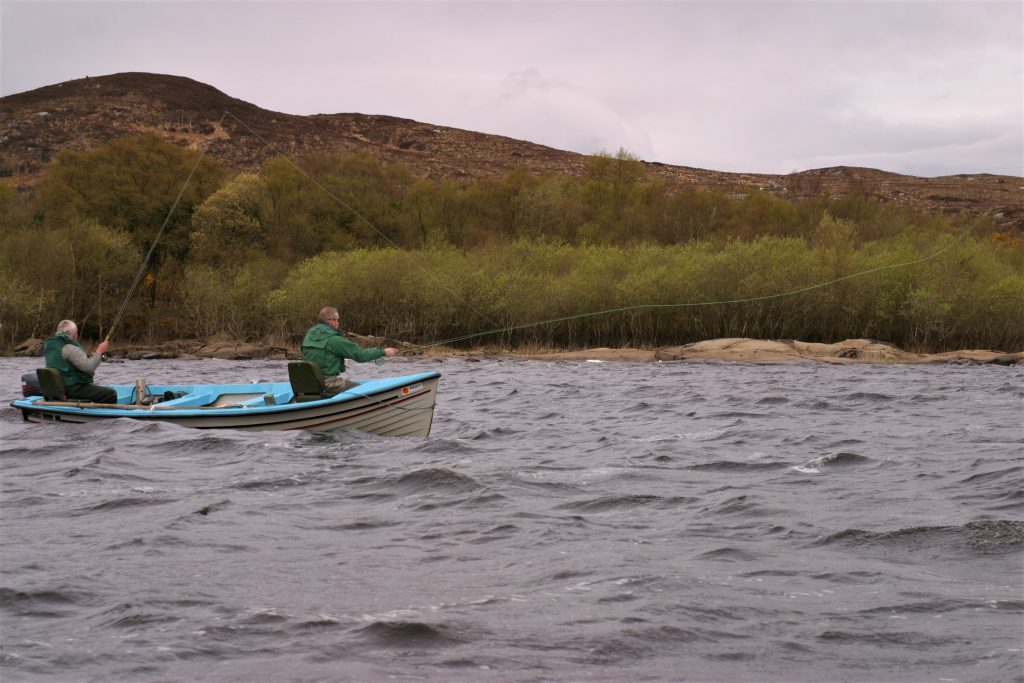
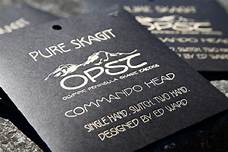
As a full time guide and fly casting instructor I have had the opportunity to cast with almost every decent rod and fly line that has come onto the market over the years.  As Mr Eastwood might say, some were good, some bad, and some were ugly, but even though I might often have seen some advancements, these were gradual until I tested the Commando Heads from OPST.  It takes something really special about a new product to get experienced fishing guides raving about it.  For me and my guide friends it was the remarkable efficiency and amazingly versatile adaptability of these OPST lines that really caught our full attention.  When clued in fishing guides come across fishing gear that is genuinely innovative and effective their first thoughts are how it will help their clients be more effective, and catch more fish. I initially tested these new Commando heads on a variety of small to medium size salmon rivers and they proved more than capable of handling every possible fishing scenario and performed equally well when used to spey, skagit, or overhead cast. I used them for pike fishing and again they were a revelation, making the fishing so enjoyable and easy.  I just knew that they were also going to perform brilliantly out on the reservoirs and lakes, and so they did.

The OPST Commando is by far the best all round line I have ever used for Lough or reservoir fishing. Depending on line class, these heads are between 12 and 18 feet long and will comfortably cope with the addition of various sinking poly leaders up to 16 feet in length.  The Commando line is a shooting head that can be attached to whatever running line the angler prefers.  I would advise that when Lough or Reservoir fishing it might be best to use normal coated running line (pvc coated like a normal fly line)  because lightweight mono running lines are too adversely affected by being blown around the boat by the wind. Don’t go for a running line that is too thin, running lines that are at the larger diameter end of the scale are easier to handle, easier to strip, easier on the stripping fingers, and slightly heavier which stops them being flapped around in a wind.  Don’t believe advisors that tell you larger diameter running lines will adversely affect the distance you can cast. Remember we are not trying to break the world distance record at the CLA, we are equipping ourselves to fish really effortlessly and effectively while out on the Reservoir or Lough.

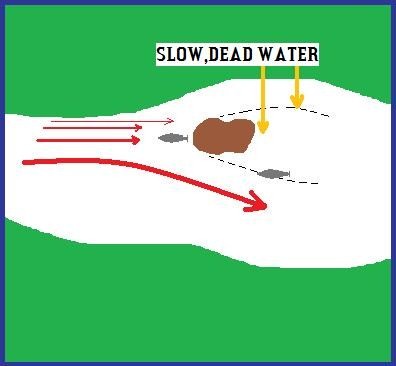
Let’s have a look at some possible fishing scenarios. You are out on your favourite reservoir and after trying a few tactics you determine that a team of various nymphs and mini lures fished with a full floating line on a 20 ft+ leader is the best approach to adopt as you drift into a big shallow bay. You start to get a few takes and you are enjoying yourself.  Gradually the wind starts to increase in strength and straightening your fly line fully on the back cast starts to become a struggle and you have already being tapped on your shoulder a few times by your flies as they whiz by you out of control.  You brace yourself to physically put more effort into your back cast but all this is no longer feeling enjoyable.

How can I cope and get back to effortlessly enjoying my day?

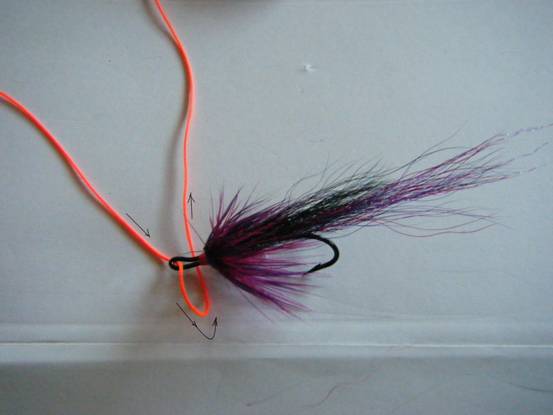
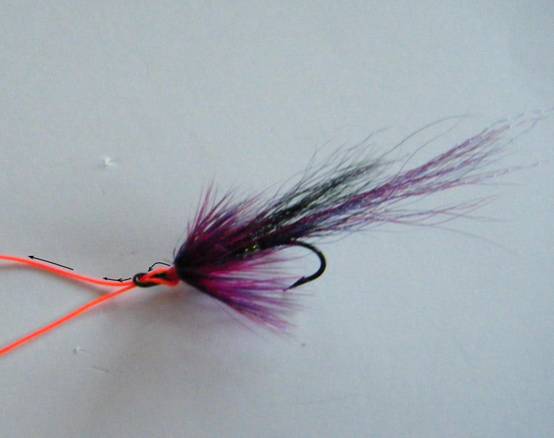
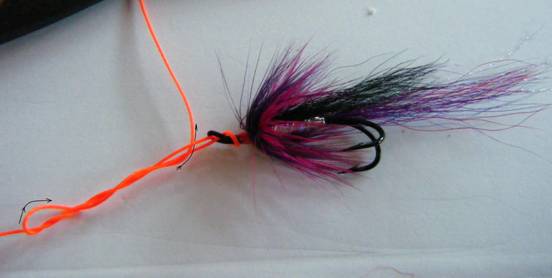
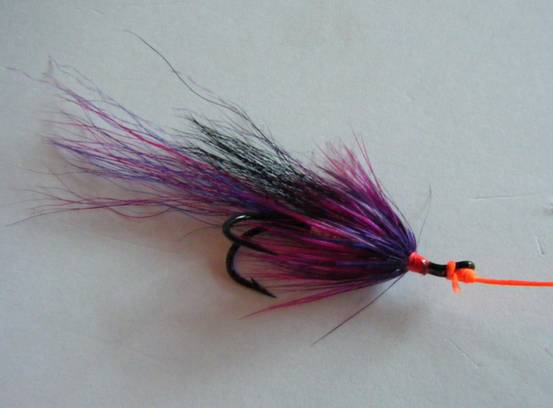
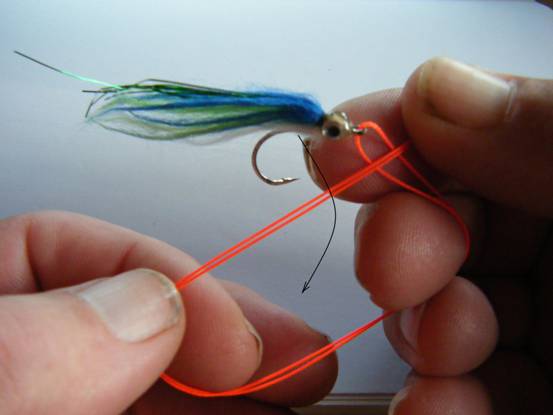
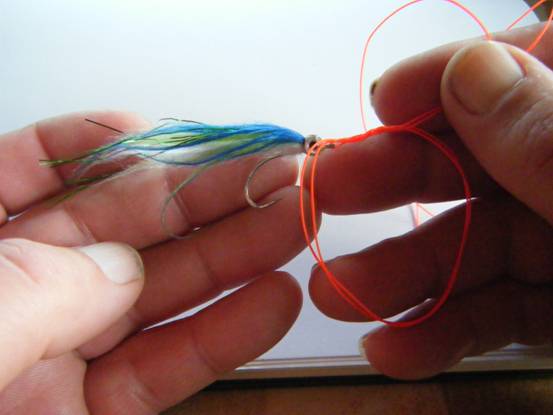
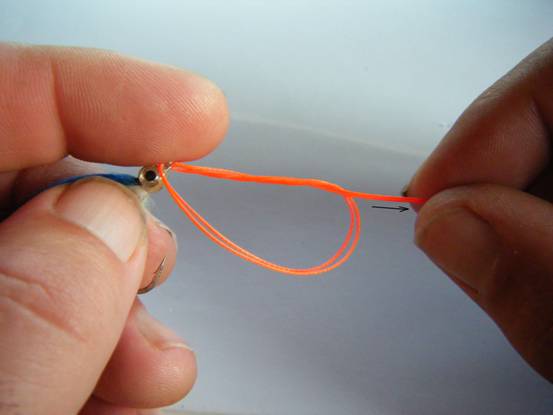
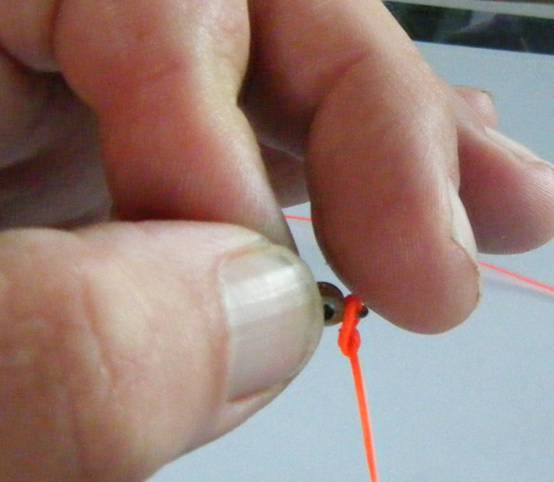
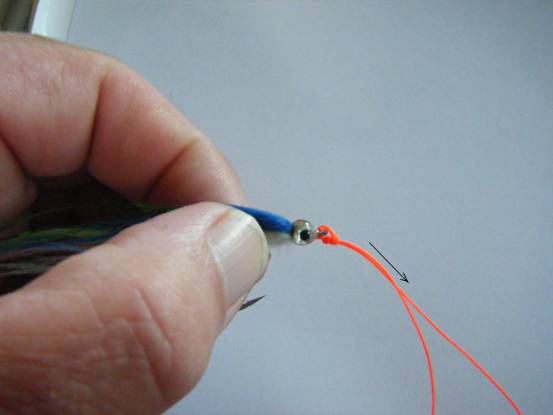
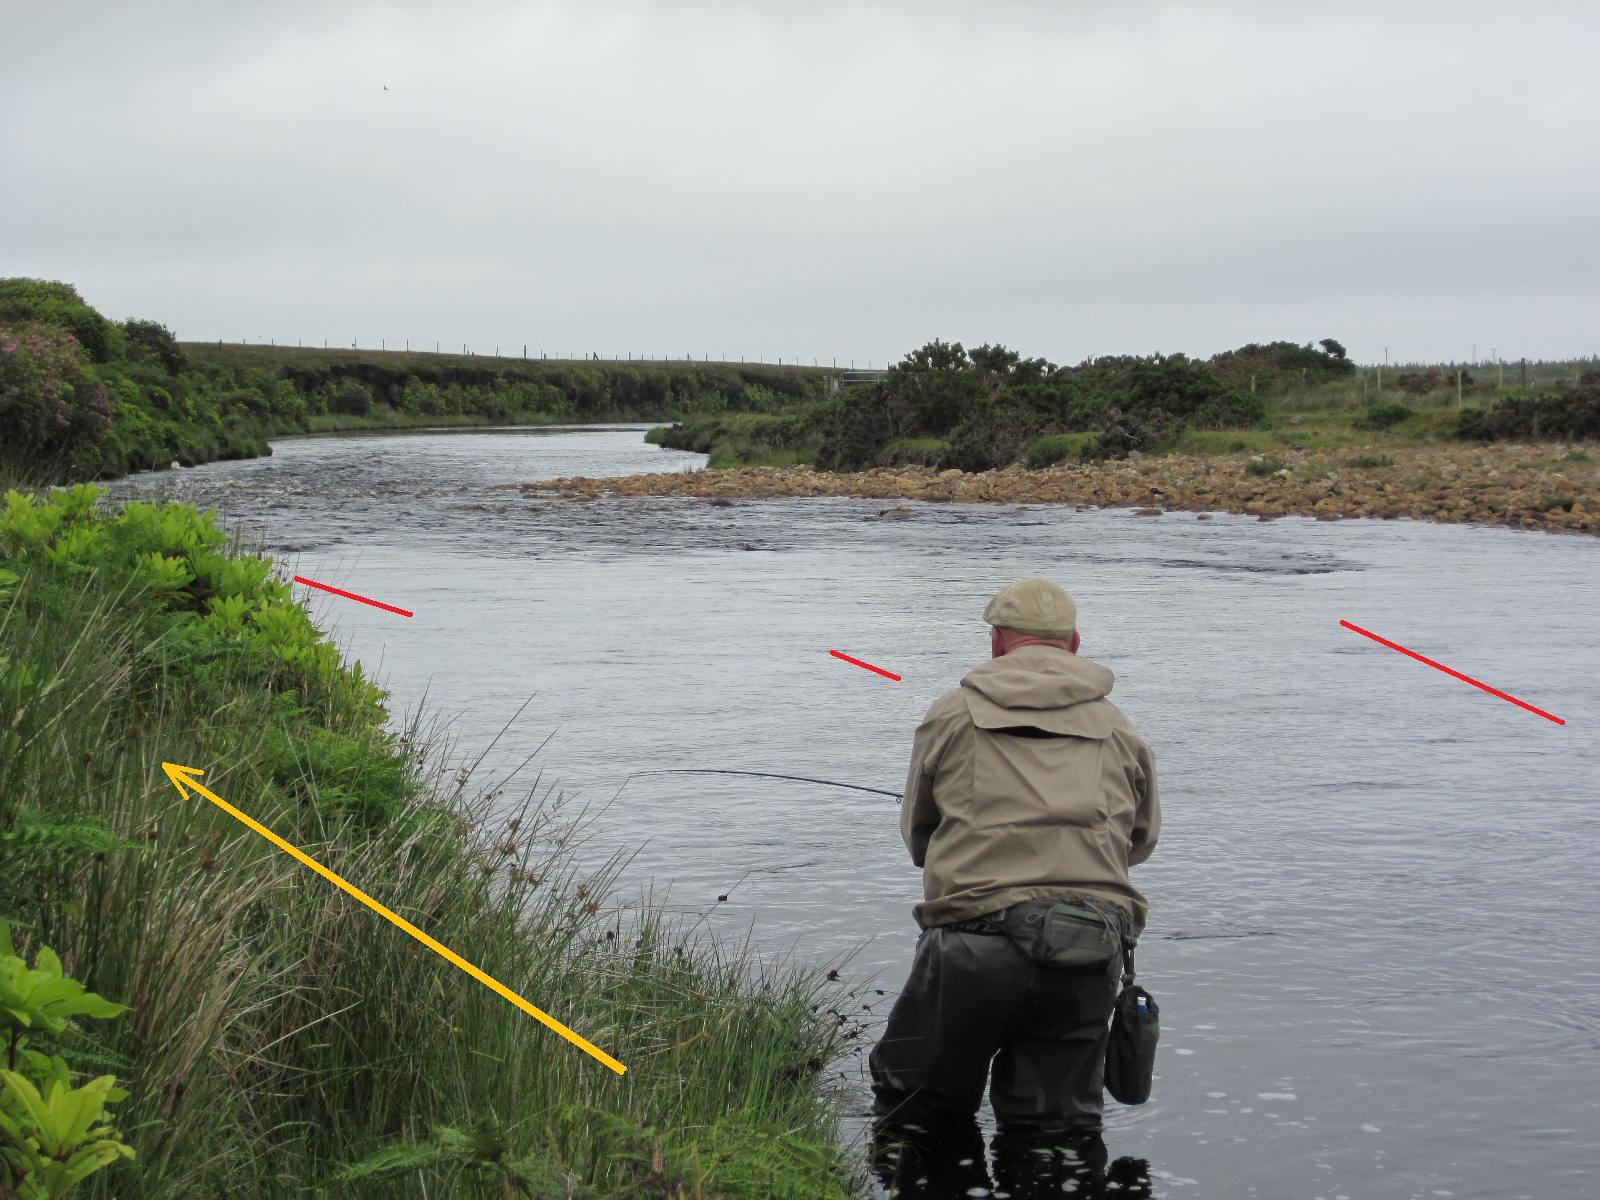
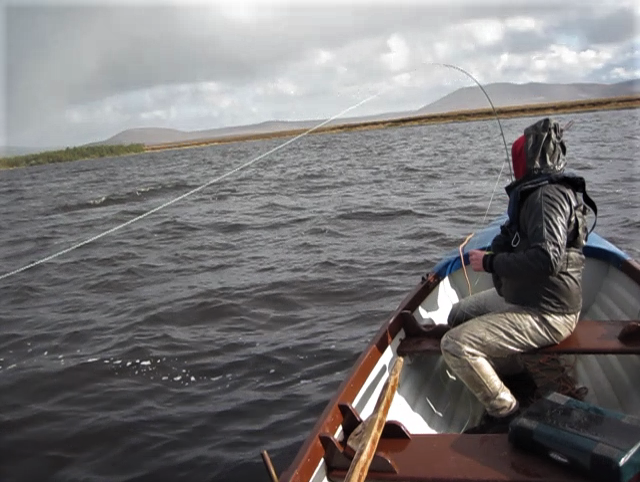
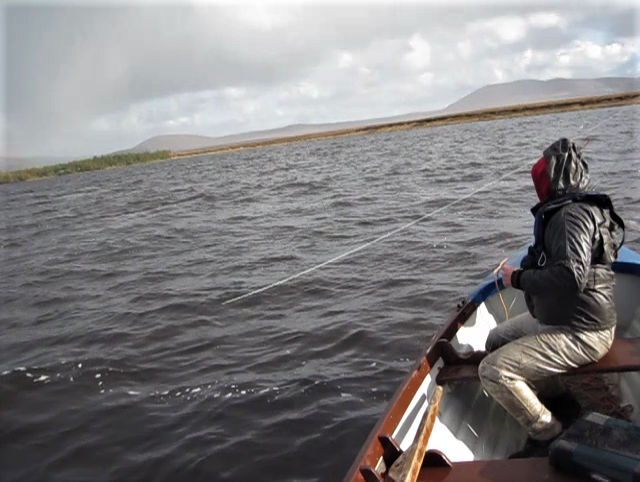
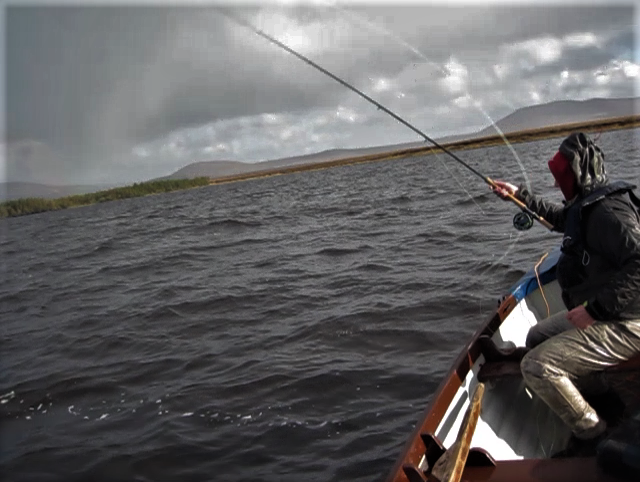
Enter the Commando with its substantially shorter head length and its remarkable efficiency when roll casting.  You can still continue to use your 20ft+ leader regardless of wind because you will now be roll casting.  Regardless of wind strength just smoothly bring your rod up into the roll cast position and accelerate smoothly to a crisp stop and release. A few tips, aim your forward roll cast at a much higher angle than normal and by this I mean at least 60 degrees.  The very last part of your forward roll cast just leading into the crisp stop should be a sword like stabbing motion because this will help combat over rotation of your wrist, and really help maintain the high trajectory that is required. If we execute our roll cast effectively then the Commando head will comfortably cast any leader or sinking poly leader that we could wish to employ. By the way, the roll casting tips outlined above will also help experienced anglers to roll cast more effectively with their normal weight forward fly lines, but using the Commando just makes it all so much easier. The photo sequence below shows good roll cast technique incorporating a forward delevery aimed high and a crisp stop.


We might be enjoying our annual salmon or sea trout fishing holiday somewhere in Ireland or Scotland and find ourselves afloat casting traditional wet flies over rocky shallows.  The ghillie or fishing guide might well have us using a fast intermediate or other faster sinking lines to search the rocky shorelines and all is well until a stronger wind starts to blow down the valley. Why not swop over to a Commando head and maybe a 14 ft fast or superfast poly leader while still retaining the same 12 ft mono leader and team of flies.

Basic roll casting with our Commando head can start out with us just sweeping back and up to either shoulder to facilitate quite a respectable change of direction on the forward delivery if required.  As we practice and gain confidence we can then start to experiment with little single or double spey casts to gives us even wider angle changes. We might even start to use casts like the Perry Poke, to help when fishing our flies really deep. All these different casts can be done in front or slightly to the side of our drifting boat without having to put our flies into the air behind us at all.

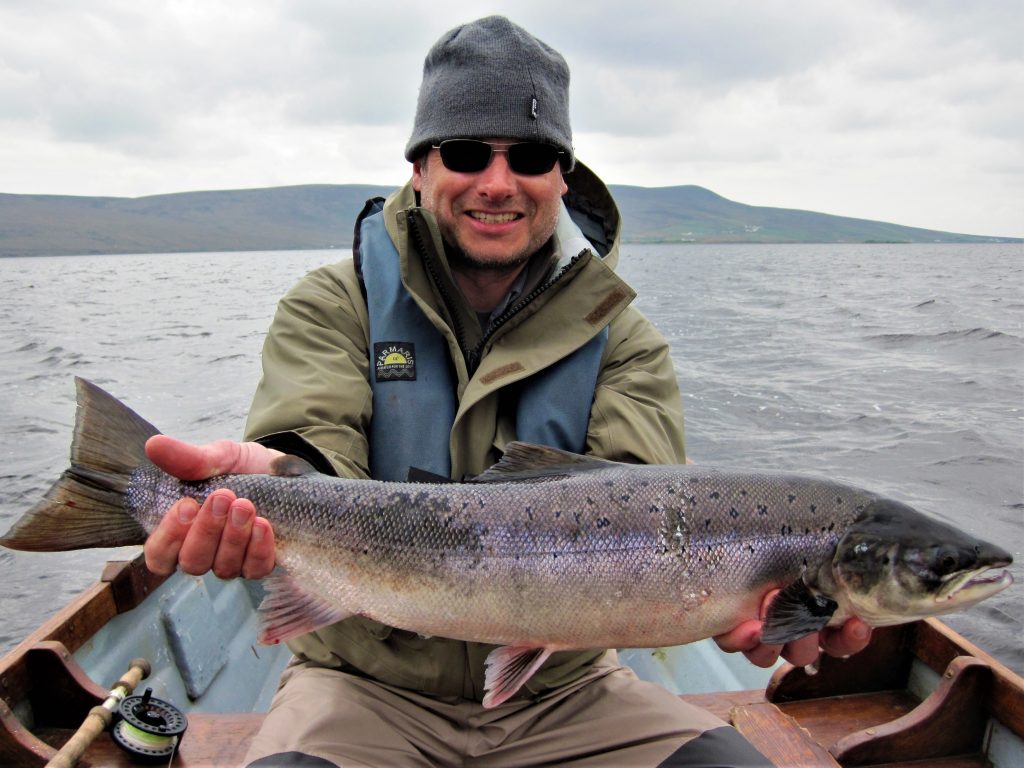
We got Vlad a Commando line last season and now he is out fishing everyone!!

Take Command of the wind and enjoy your fishing

All the best

Paddy


The Vulnerable Prey Image (Part 2)

The Vulnerable Prey Image (Part 2)

In part one we looked at what predators are instinctively programmed to recognise as not only prey, but easy to capture prey. The most gain for the least effort, banking on the sure thing, minimising wasted effort, are the cornerstones on which pike, salmon, and trout approach obtaining food. With the evidence in the photograph of the trout with the fry imitating fly in its mouth, it is not too hard to agree with the Vulnerable Prey Image theory, as it is easy to imagine our predatory trout launching the attack on our fly as we jink, stutter, or maybe wobble it during our retrieve. The application of the theory gets a little harder to visualise, and more complex, when we try to apply it to trout feeding on insects.


It’s not so much what this trout saw, as what it thought it saw
The fly is bait fish imitation called a Minky

  In the Vulnerable Prey Image (Part 1) we have looked primarily at predatory behaviour, when fish such as trout and salmon target bait fish, or fry. This involves the predator in actively chasing, and aggressively capturing the prey, but trout are not only aggressive chasers, as their survival demands they be flexible enough to adapt, and maximise their feeding opportunities to include a wide variety of food items.
Trout feeding in rivers often hold their position, and allow the current to bring their food to them. This type of feeding behaviour can probably be best described as static harvesting, or interception. The principals of predatory behaviour are still being adhered to by the trout in this situation, as they are using the energy of the current to bring food to themselves, and are obtaining food for little effort. It is a little harder however, to accept the concepts of predatory behaviour, and the vulnerable prey image, when we try to apply other principals, such as-banking on the sure thing?, easy to capture prey?, why is this food item/nymph/ insect a sure thing?, what is it about this insect that makes it look vulnerable, and easy to capture?, what triggers the trout to target certain flies as they swim over them?, why do small trout seem to target everything that passes over them, but larger trout seem to be more selective? . In trying to come up with answers to these questions, we must take into account that when we present our dry flies to rising trout, we must as a rule try and achieve a drag free float, in other words our fly must swim totally naturally downstream at the same pace as the water current. (The exceptions to this rule would be when imitating some species like caddis/sedges which can often skitter across the current flow) We are now unable to add any physical techniques to enhance the Vulnerable Prey Image of our fly, so we must rely heavily on fly design, and any properties that we can incorporate into that design, to enhance the image of vulnerability.

Frederic Halford, “The Father of Modern Dry Fly Fishing”

Dry flies in all the various styles we have at our disposal today are the product of many years of observations on trout feeding, analysis of trout stomach contents, and the inventiveness of clued in, observant anglers translating all this into new fly designs at the fly tying bench. Frederick Halford was born into a wealthy Jewish family of German ancestry in 1844 in Birmingham, England. He is generally recognised as the father of modern dry fly fishing, and was part of the upper class elite which had privileged access to the best trout fishing on the famous English chalk streams. Halford along with this privileged elite encouraged a very narrow view on what they thought fly fishing should be about, and especially dry fly fishing. The dry fly fished only upstream, and only to trout that were actually rising was the order of the day. This dogmatic, so called purist approach was also held to be the most sporting way to fish for trout and to a certain extent lives on to the present day. Even today we occasionally hear statements like- the dry fly is the pinnacle of sportsmanship, or that it takes more skill to fish dry fly. Mr Halford may have been a little too dogmatic, and elitist, but he did help to start a much more sophisticated approach to tying artificial dry flies, and was one of the first to try and tie exact imitations of the natural insects hatching on the chalk streams. This exact imitation school of dry fly angling eventually widened its scope in later generations to become what is now known as-Matching the Hatch.

 A fully hatched upwing fly also called a fully hatched Dun

The insects Halford was trying to imitate were mostly upwing flies, and it was the fully hatched dun resting on the surface that received all the attention. The almost total disregard for the different stages of emergence of these upwing flies prior to the fully hatched dun stage, was probably the greatest failing of the Halford era, and because this total focus on the fully hatched dun was reinforced in Halfords own books, it became the gospel to follow for other writers, and anglers, even many years after Mr Halford’s death.
Before we continue in our study of the history, development, application, and importance of fly design, as it applies to, and enhances The Vulnerable Prey Image, we might just take a quick look at the reality of why all this stuff is so important. One of the first things that a beginner has to get to grips with is which fly to use, and why.
As our knowledge and experience grows, we start to become more observant about what is really occurring as trout feed in front of us. We start to become aware, and interested in all the various stages in the life cycle of the insects that trout feed on. This study of the life cycles of insects is very interesting in its own right, and we don’t have to get too wrapped up in all the Latin names and terminology, we just need to acquire a reasonable working knowledge of the insects where we fish.
There are many variables involved, with even the most experienced anglers occasionally reading the signals incorrectly, and choose the wrong fly design to match the specific stage of emergence of the natural. You see I have emphasized the term – wrong fly design-, as opposed to saying the wrong fly, because I believe it is the design of the fly and where sits in relation to the water surface film that often makes the difference between success, and failure.

A selection of dry flies for the loughs-but how do we chose which one to use?

Down the years as strict adherence to Halfords doctrine of only concentrating on the exact imitation of the fully hatched dun floating on the water surface started to wane, and observant, thoughtful, anglers became fully aware of the importance of the emerging insect as it struggles to break free of its shuck. They also observed that some of these hatching flies actually died, or were injured during the process, and the term-stillborn emerger was invented along with other various descriptive names, such as, the crippled emerger, or drowned dun. People like Ward, Mottram, Tinbergen, Marinaro, Richards, Swisher, Caucci, Lawrie, and La Fontaine to name just a few, all added to the overall knowledge that we have at our disposal today. The main thrust of which points us in the direction of the importance of the emerging fly/crippled fly/ being at least, if not more important than the dun


Dibbling the top dropper fly in the waves of an Irish Lough imitating an insect struggling to hatch or one that has begin battered into the surface by the wind and rain


Before we try and answer some of the questions asked earlier in this article. It might be good to have a look at some relevant aspects of trout feeding behavior. Small hungry trout have to learn what is edible and will have a go at almost anything that floats over them. This trial and error feeding routine becomes less prominent as our young trout gradually learns and becomes more competent. Our trout also learn to use their energy wisely when harvesting this food, so as to maintain a positive balance in favor of the energy gained from the food, versus the energy expended in obtaining it. Trout feeding behavior is partly learned along with being partly genetically imprinted from previous generations of successful members of the species. Large trout don’t get large by chasing, or harvesting prey items which are too small, or which are available in insufficient quantities.  They hone in on insects that they know are in trouble, crippled, stuck in the surface film, drowned, struggling to emerge , or are being battered into the water surface through wind ,and rain. All these unfortunate insects will create a particular image of vulnerability, depending on each situation, and it is up to us to provide the correct illusion with our flies/presentation, which might incorporate such triggers as, attached shucks, jumble of tangled legs, wings horizontal in the surface film, among others. Also the flies position on, in, under, or penetrating the surface film is very important.

The artificial fly above is a Klinkhammer invented by Hans van Klinken .  It is one of the best flies ever invented as it suspends the abdomen and thorax of an emerging insect just under the surface film.  A vulnerable time for most insects and in fact we could if we wished, add a shuck or trailing legs to the fly above to make it look even more Vulnerable

Even if we wanted to, we cannot tie an artificial fly that is a perfect copy of a natural fly. Even if we could it would not be a major advantage to us because then our perfect imitation would just look like all the other natural flies when we fish and our perfect imitation would be just one in the crowd. Big trout are often looking for flies that are showing signs of Vulnerability and that means flies that are less than perfect. If you go to any river or lake on any given day during a big hatch you will meet many successful fly fishers who were actually using quite different flies. The reason they were successful was not because they were fishing with perfect imitations of the natural fly, but because they were fishing with imperfect copies of the real insect, but their flies must have had a few good trigger points that portrayed the illusion of Prey that was Vulnerable in some way.

We all have heard of the local fly fisher that catches lots of trout but sometimes the flies they tie don’t look great or as some might say – look scruffy!- well take my advice, and if possible,  politely ask these successful fly fishers for second look into their fly boxes!


One of the greatest dry flies ever invented The Grey Duster seen here on the left.

This one has had its hackle clipped underneath to let it fish flush in the surface film, imitating a trapped insect. If the hackle is left as normal (fully wound), then it will fish more on the surface. The fly at the top is a Mc Carthy Buzzer. Extra turns of hackle in this pattern allow it to be fished right on the surface, imitating a female buzzer laying her eggs, and any light breeze will make it tickle about a little, mimicking the swirling action of the female. In calm conditions a gentle stutter of the rod tip will move it just enough to draw attention. The Shipmans Buzzer is our third fly. This fly was designed to represent a buzzer hatching, right in the surface film, a position, and period of emergence that screams vulnerability. If this fly is being fished correctly (well sunk in the film), it should be difficult to see. Some anglers find this inability to see their fly as a handicap, but don’t worry; you just need to sight down along your floating line and imagine approximately where you think your fly should be and you will be right most of the time. Even if you are not exactly accurate in your calculations you will always see the rise! .

 Two great dry fly patterns from my English reservoir days

The top fly is a pattern called Bobs Bits, invented by Bob Worts, and once again it is meant to be fished well sunk in the surface film. The second fly, with its knotted pheasant tail legs trailing back, and down is a Bristol Hopper. A super fly that can represent hatching buzzers, terrestrials, or olives, all we have to do is vary the size, and colour. The simplicity of these hugely successful patterns goes a long way in proving the theory that trout are only looking for 2-3 triggers when targeting insects near the surface. Some of the triggers incorporated into these simple to tie flies are-translucency by using seals fur in the bodies, sparse insect like profile, sparse undercut hackle to let them fish flush in the surface film, knotted legs representing either emergence,, crippled emergence, or pupal shuck, colour matching the hemoglobin that the natural buzzers pump into their wings as they hatch, but most of all it is the design of the fly which allows it to be fished in the insect trap that is the surface film, and creating that Vulnerable Prey Image.

Some of the fly designs that catch more than their fair share of big trout annually

On the right we have a mayfly dun incorporating cdc, and without any hackle underneath, especially good in calm conditions, where delicacy of presentation is crucial. The sedge fly on the left is well hackled, and has a substantial cdc wing, making it a specialised weapon when we want to create the fish attracting vee wake that large natural sedges make as they scurry around, or when swimming strongly for the safety of shore. The design for function being probably more important than, say colour. There are few Vulnerable Prey Images which advertise their presence so openly as sedges furrocking around in the fading light of evening time.
Our last fly is a spent mayfly pattern, with its outstretched wings tied in a final delta shape of total submission. The ultimate in vulnerable design, a fly that the trout knows is dead or dying, and will never escape Trout Heaven !.

The fully hatched dun is of course taken by trout, and it is always wise to have some in your box, but often it takes a heavy hatch before the trout will become totally locked onto them. Most trout that will take a dun imitation will also take an emerger pattern, but trout that are zoned in on pre dun stages, will very often totally ignore the fully hatched fly. There have being many elements on the history of fly design, trout behavior, and general dry fly technique that I have had to omit in this article, but then the main focus was on trying to emphasize the importance of , and the application of the concept that is vulnerability.
All successful dry fly anglers have the same attributes in common, and they are, correct choice of fly design to match what the trout are actually feeding on, delicate, and accurate presentation, along with the ability to accurately gauge what amount of movement to impart to the fly if any .

If you have enjoyed this article please share it with your fishing friends on Facebook.

All the best

Paddy

not sure–OR–Knot Sure

not sure– OR– KNOT SURE

The most popular knot used by fly fishers to tie their flies to their leaders has to be the half blood knot or as most American anglers call it, the Clinch Knot. With a high knot strength and being easy to tie, it has gained almost universal acceptance as the go to knot for tying on our flies so it must be the best knot??.  If we observe experienced, clued in trout or salmon anglers it will become noticeable how often they check their flies to make sure that they are ok, and it is not just to check for weed on the hook point or wind knots in the leader. It is to make sure the problem depicted in the picture below has not occurred

As we can see, this half blood knot has pulled around to the side of the hook eye and this can happen no matter how tightly we pull the knot when it is first formed. This fly will not swim properly. The problem also happens with trout wet flies, dries, nymphs and streamers. Experienced anglers are aware of this problem and just resign themselves to the knots shortcomings. However, there are two better knots that we can use!

In the picture above we have a salmon fly with an upturned eye but it doesn’t matter which way the eye is turned because this knot will work. Pass the tippet through the eye and around under the shank of the hook.

Pass the tippet back out through the eye making sure you leave 4 or 5 inches of tippet outside to finish the knot.

Now all we have to do is make a normal half blood knot as normal and draw it up tight

When we draw the knot tight the bulk of the knot fits very neatly into the eye of the hook. Some anglers use a Turle knot or a double turle knot to replace the half blood knot to cure the problem of hinging, but this knot is neater and easier to tie as we are still using a knot that we already know to finish the knot.

Here we have a view looking down at the top of the fly and you can see how neat the finished knot is. As an experiment hold the fly and pull strongly on the tippet from different angles and you will find that the knot stays put, maintaining a perfectly straight joining between fly and tippet. I believe this knot was invented by Gordon Lesinger and the great Art Lee christened it the Tweed Clinch.

Now we have a truly effective replacement for the half blood knot especially for trout or salmon flies with a pronounced down turned or upturned eye and it will also ensure that our flies will always swim straight.

I came up with another knot many years ago as a replacement for the rapala knot when fishing small plugs for salmon or trout.It is very quick and easy to tie. It gradually dawned on me that my new knot might also be useful for salmon and trout flies as it would allow a lot more lifelike movement in my flies while still allowing them to track straight in line with my tippet. This knot,shown below, is basically a modified double overhand loop knot with the fly inserted in before we start. I have never given this knot a name so to save confusion with the overhand loop knot lets call it The Moy Loop.

Put the tippet through the eye of the fly and make sure to leave 4-6 inches of tag end to make our double overhand loop

Just pass the fly through the big loop twice


The fly has been put through the big loop twice

 Trap the loop behind the hook eye with your index finger and holding the two loose ends together evenly then pull in the direction of the arrow to close the loop

Pull the knot until it closes gently around the hook eye, don’t pull to tightly at this stage


Gently ease the semi closed knot from the side of the hook eye to the front and holding both lose ends evenly then tighten the knot fully

Clip off the waste tag and there we have it, The Moy Loop

 A buzzer tied on with the Moy Loop

When we fish very rocky rivers we may have to use tippets that are much larger in diameter than what we would normally like to use because of the likelihood of abrasion against these hazards. Flies tied to heavy tippets with half blood knots lose most of their lifelike movement but  we can now employ the Moy Loop which will allow our flies have maximum lifelike movement while still swimming straight and true.  Nymph fishing for wild stillwater/river trout is all about presenting our flies at the correct depth and allowing them to fish as naturally as possible and here once again the Moy Loop knot with its ability to provide the maximum possible free movement  will also match these requirements perfectly.

When dry fly fishing for trout on heavily fished rivers the trout can become very spooky as regards to our flies dragging on the water surface creating a wake  . Even the tiniest hint of drag (sometimes called micro drag) can put them off rising to take our dry flies. Here once again the Moy Loop knot with its maximum free movement capabilities would be a good knot option to use.

As fly fishers, we do not need to know how to tie dozens of different knots.  If we know how to tie 5 or 6 good ones for various applications/situations then we should be well equipped to tackle the vast majority of fishing scenarios. Now you have two more to add to your arsenal !!

All the best,

Paddy.


www.paddymcdonnell.ie

Salmon Lies (Part 4)

Salmon Lies: Part 4
The picture above is the same as the one we looked at in part 3 of this series. A rock (yellow arrow) causes a fairly evenly divided break in the current flow with an area of turbulence immediately behind it. When the braids of current rejoin there is an area of smooth evenly flowing current formed that creates and is a salmon lie (red arrow). In this case the current broke evenly and the salmon lie is created directly downstream from the rock. These breaks in the river current caused by rocks don’t normally break so evenly and there is usually only one braid of current created downstream of a rock that will possibly provide a moderate even flow of water.
This term moderate flow is difficult to describe, but if we wade out into some shallow streamy water and stand facing downstream with both legs close together we can then bend down placing our hand in the water to gauge the effect our submerged feet have on the current flow. If we place our hand in the water immediately downstream from our legs we should feel fairly slack/dead current and as we move our hand outwards to either side we will feel fast water. Somewhere between the two extremes we should be able to feel a moderate flow of current, and this will give us a basic understanding about the effect that rocks might have on current flow/speed. Salmon rely on obstructions such as rocks to provide this break in the current and insert themselves into the moderate flow which they prefer.


This diagram shows a large rock and its effect on current flow. The big curving red arrow shows the path of the main current in this pool and the other red arrows diminish in size indicating a gradual reduction in current flow across the pool. It is more than likely that a salmon will lie along the current break on the main current side of the rock as opposed to the slower flow on the other break line. The current flow that meets the rock head on is fairly moderate, and in situations like this salmon will sometimes lie in front of a rock.

 In this diagram a combination of rocks can create the right conditions for even more potential lies. Depending on the size of the rocks involved (especially a combination of large rocks) there is more of a chance that moderate flows will be created. The black arrows show the deep main current, with the three small red arrows indicating a weak secondary flow. The large red arrow indicates an area of weak current over water that is too shallow to provide ideal lies. These break lines (black dotted lines) can be either evenly flowing or swirling/turbulent/eddying. Salmon will not lie in swirling/turbulent/eddying water.

 This diagram depicts a tributary stream where it enters the main river. The orange arrow shows the main river flow and the blue arrow shows the tributary stream. Where the two currents meet (two red Xs centre river) once again may provide moderate evenly flowing water and the fish can insert themselves along this break line, with the added bonus that all fish travelling up either river will pause at least momentarily so they can decide which one to ascend. The black dotted line is another break line along the inflow of the tributary stream, where slack water meets faster water, and the angler must be careful not to spook any fish lying here as they will often be quiet close to the river bank. The red x just downstream from the rock is another salmon lie along the break line created by the rock.

When faced with a smooth surfaced pool with few clues at the surface to help the angler to figure out where the lies might be or where the main current is concentrated the angler needs a little extra help and this comes in the form of wind

 With a breeze to ruffle the surface of a normally flat surfaced pool, we now start to see some smooth areas among the ripple. These smooth areas are strips of evenly flowing current that the wind is unable to ruffle because the current is stronger there than the rest of the pool and usually pinpoints the main current seam through the pool. An upstream wind is best but as you can see in this photo even a downstream wind can work its magic also. This is a super tool for the angler trying to decipher featureless/slow current pools as the wind reveals not only where the main current is located , but it will also reveal the location of possible individual salmon lies just off the main current flow.

 In this photo the red lines indicate where salmon may pause momentarily when entering this pool , with the red line on the left showing the location in low water flows and the other red lines showing the pausing positions progressing across the pool tail at medium and then high water levels. The most important thing about this photo is actually the positioning of the angler as he fishes down the pool. He could have easily worked down the pool from on top of the bank (yellow arrow) but he wisely decided on the stealthy option and waded quietly down along the edge. Being able to work out where salmon might be lying is a great weapon in our arsenal, but it is often so easy to spoil all the good detective work by showing ourselves to the fish.
All the best, Paddy